Caiframe products are meant to be used in the outdoor, which means to be exposed to weathering, and in order to use them at their best it is necessary to accurately view this manual which is integral part of the product and must be periodically consulted even in its updated versions, simply logging to our internet site.

A careful consultation of this manual will allow to.

  • Follow the rules for a safe use
  • Understanding the correct use of the product to keep the health and hygienic healthcare of the rooms
  • Correctly use Caiframe prducts to keep a high level of comfort insithe the house and a high energy saving
  • Identify any damage and perform a periodic and correct maintenance

02.1 INITIAL WARNINGS BEFORE USING THE PRODUCTS

Before using Caiframe window frames, make sure to follow these general instructions:

  • Verify the absence of foreign objects that might hinder the correct functioning of the window frame
  • Check the correct installation and positioning of every accessory
  • As long as the building site is not concluded, carefully control that the products are not soiled with aggressive substances such as mortar, plaster and paint that might irredeemably damage its paint coating, resulting in permanent flaws on the surfaces, upon which Caiframe declines every responsibility
  • At the end of the works in the building site, it is appropriate to clean the window frames following the instructions contained in the ‘Cleaning’ section of this manual

02.2 GENERAL WARNINGS FOR THE USE OF THE PRODUCTS

  • Quickly remove the adhesive cleats of the packaging attached to the window frame, as their persistence for a long time might stain the paint coating
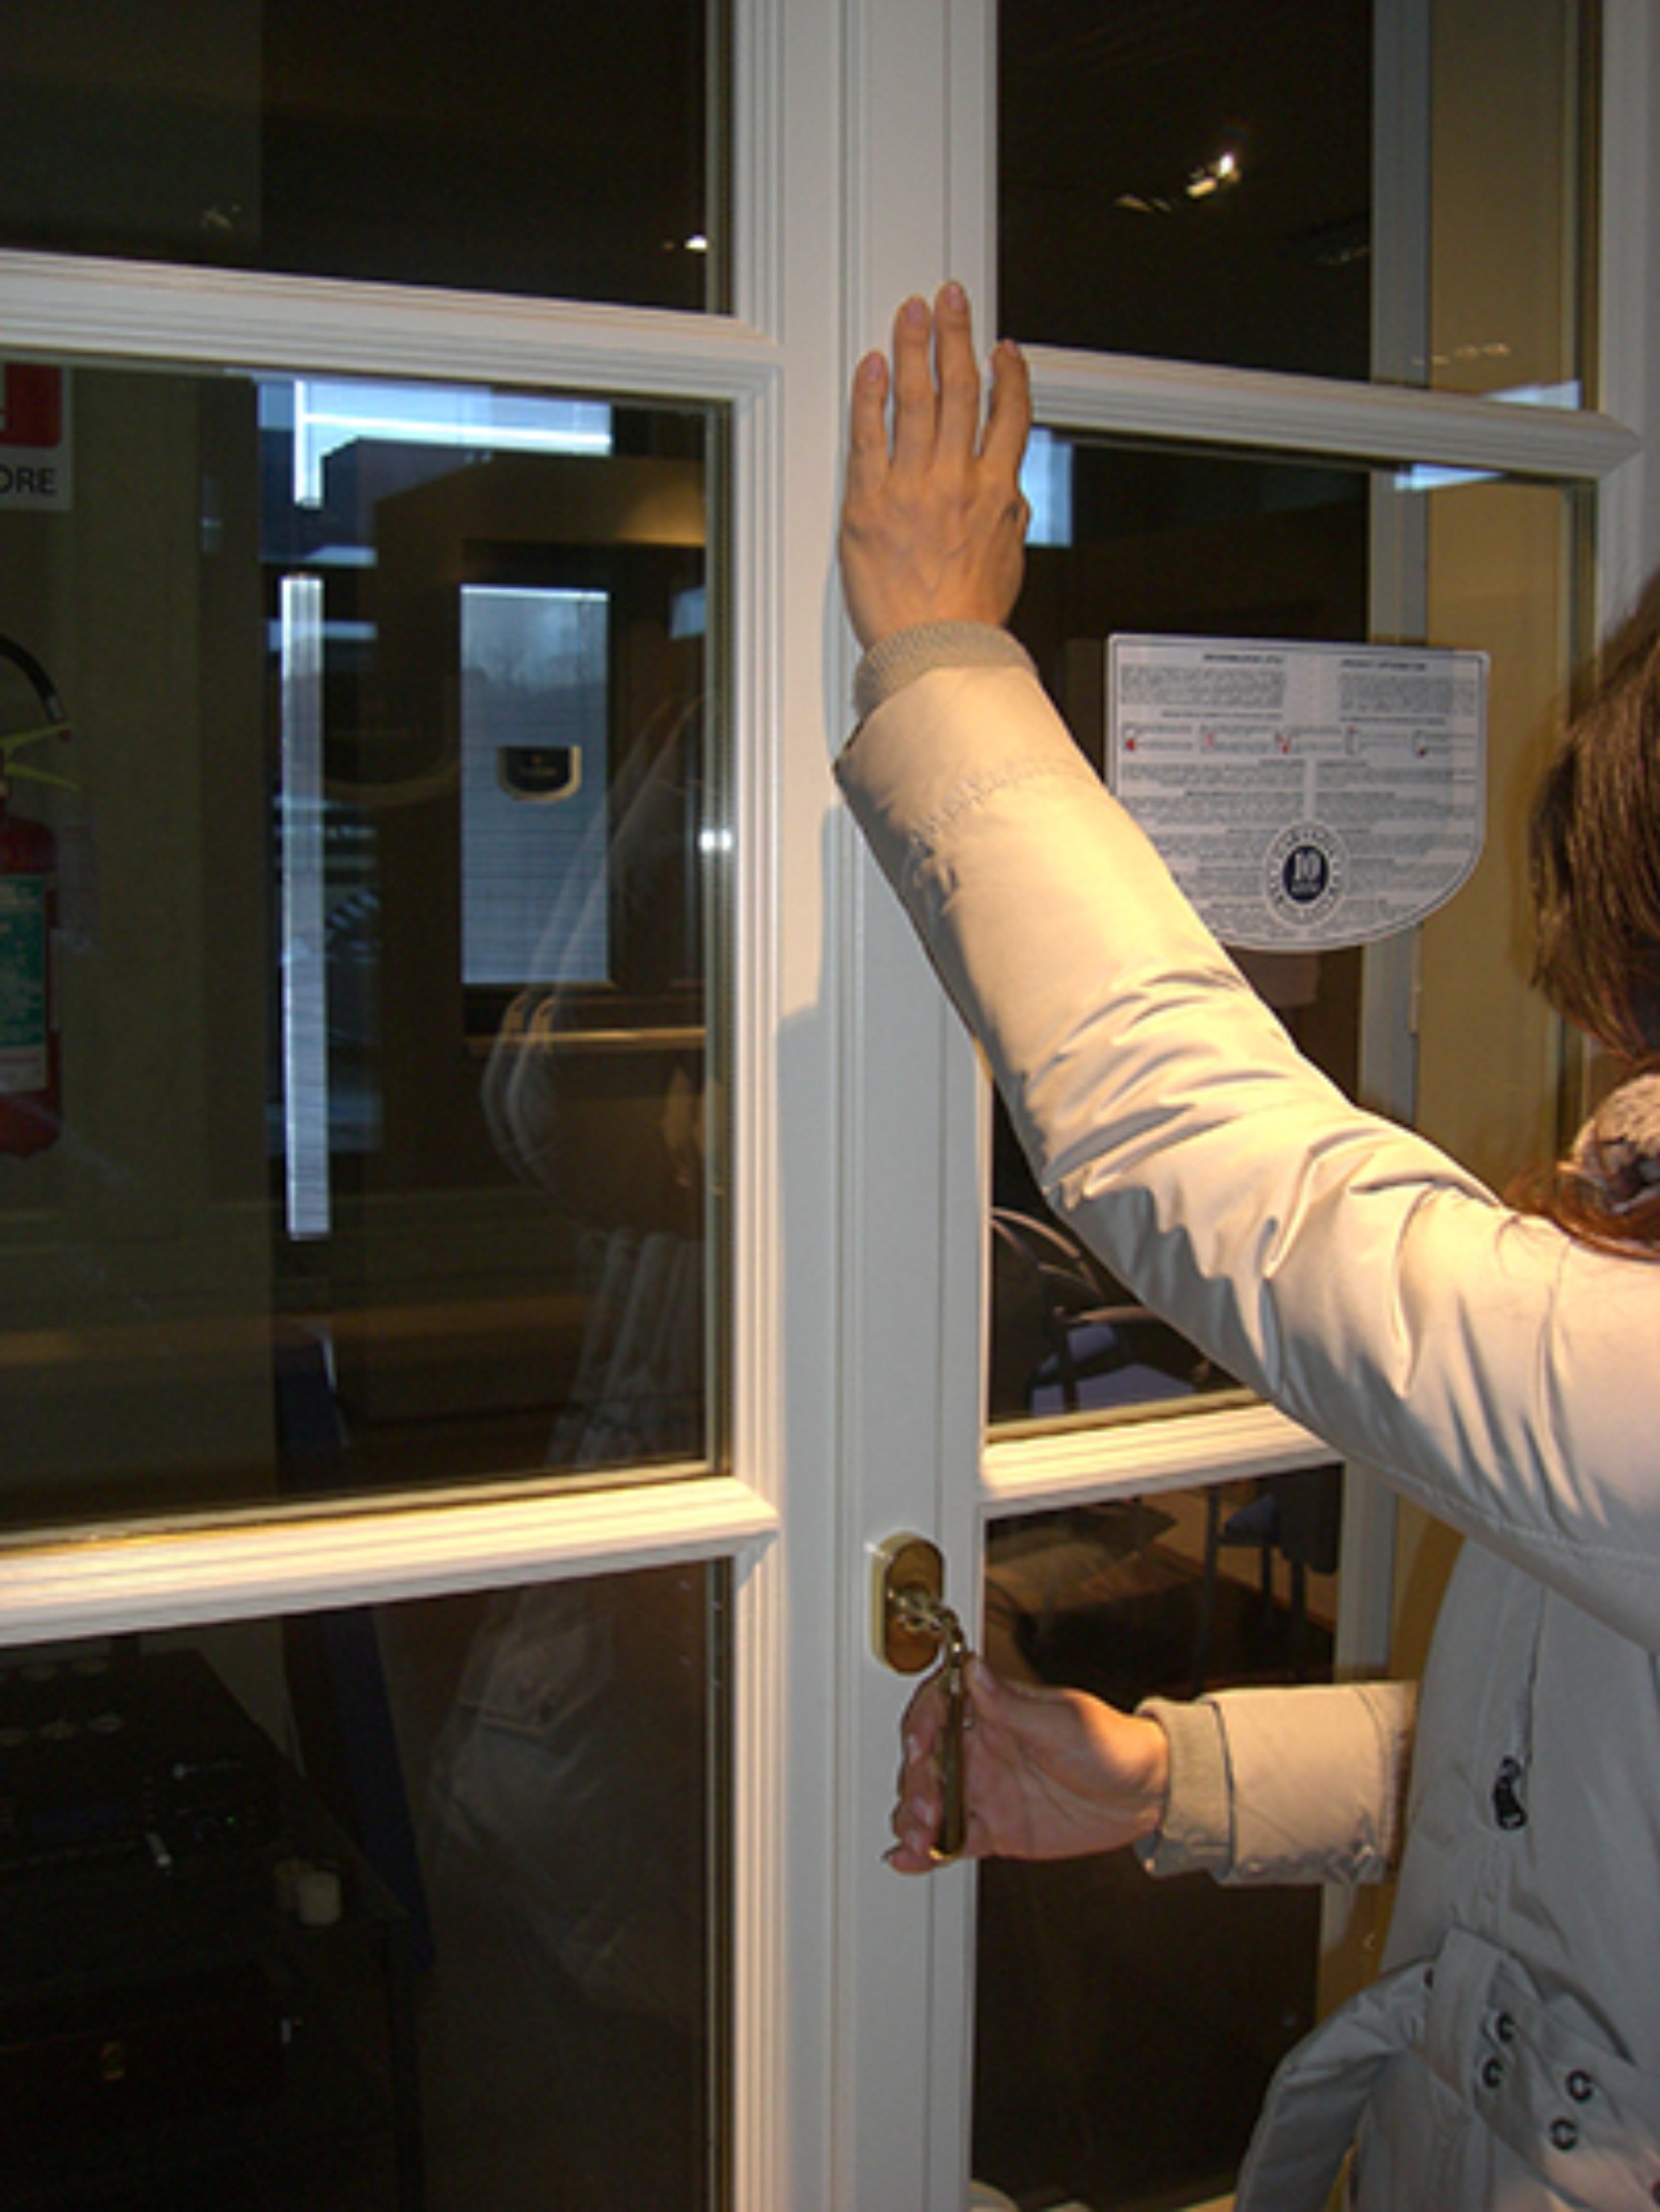
  • Strictly keep the shutters closed during the first 30 days after mounting. During this initial period, the wooden window frame suffers for the first time the action of the weathering and tends to settle. Therefore, during this phase the shutter must be kept inside the frame as much as possible. Strictly avoid letting the shutters open for the first 20/30 days. Use the tilt door system for the room’s ventilation (must be done daily) and once the rooms are ventilated, quickly close the shutter
manuale-avvertenze-utilizzo 
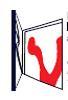
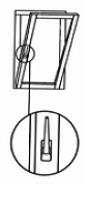
Danger of accidents due to crushing in the open area between the shutter and the frame.
manuale-avvertenze-utilizzo-2 
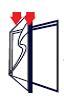
Danger of accidents due to wind and air gusts . close the shutters in case of wind gusts.
manuale-avvertenze-utilizzo-3 Danger of fallng. Especially don’t leave children unattended near the window.

Wrong use of the window:

manuale-errato-utilizzo 
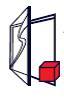
Avoid overloading the shutters .
manuale-errato-utilizzo-2 Don’t interpose obstacles in the open space between the shutter and the frame.
manuale-errato-utilizzo-3 Don’t interpose obstacles in the open space between the shutter and the frame.
  • Avoid violently and uncontrolledly slamming the shutter (for example by the wind) against the frame: the hardware, frame and other parts of the window might be damaged.
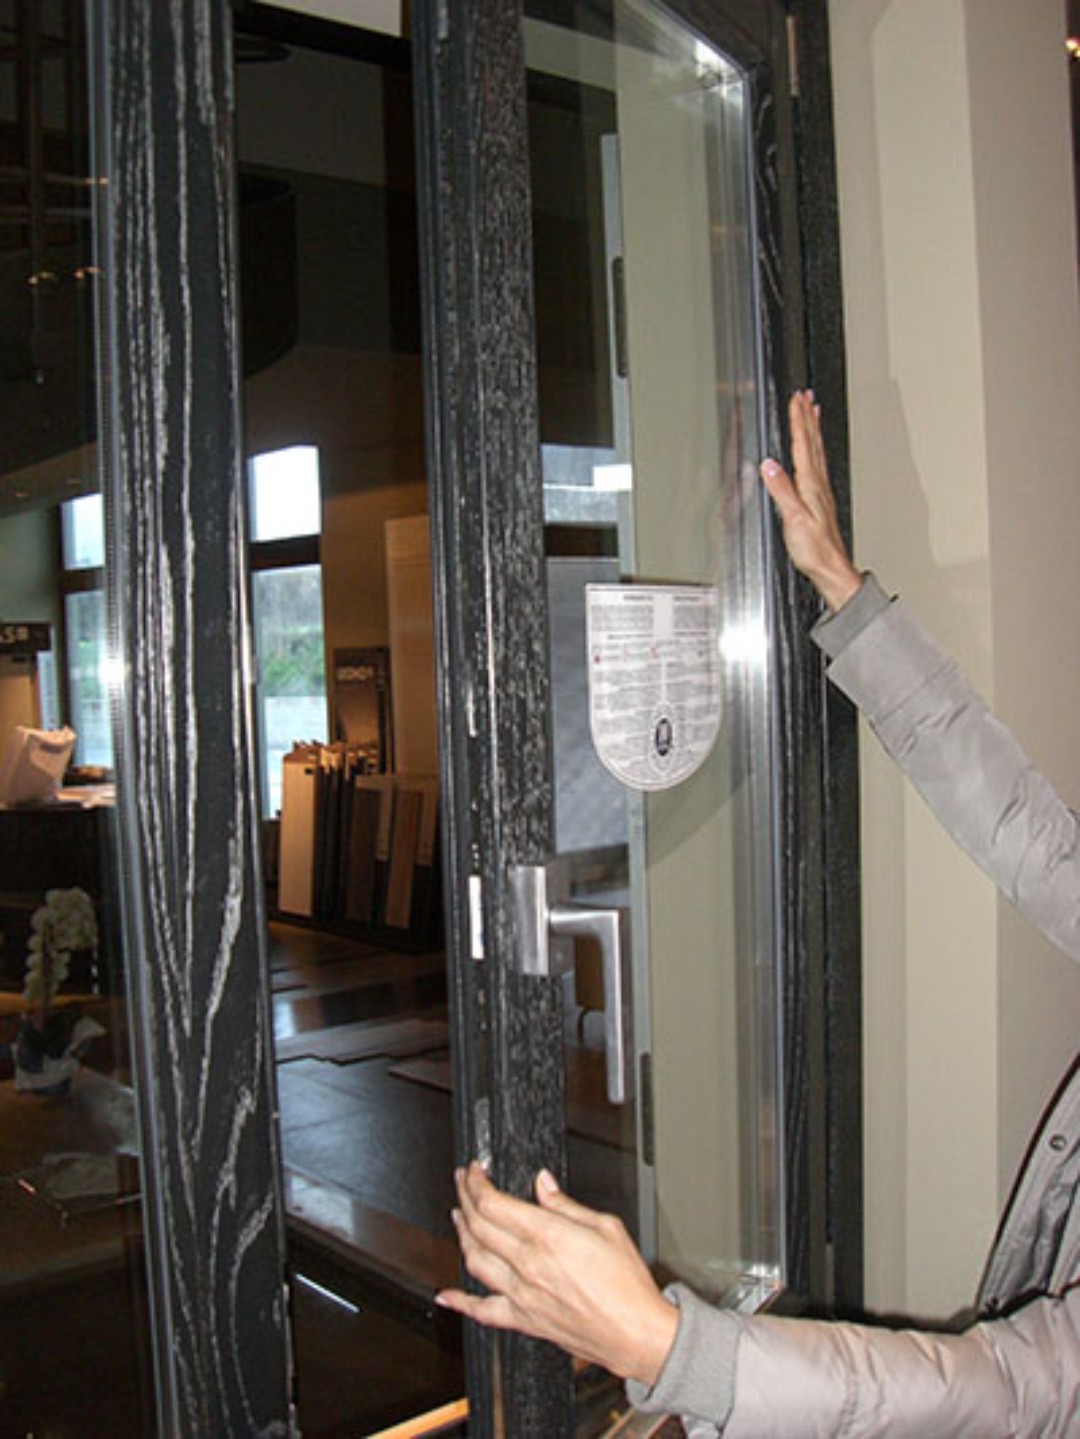
  • The open knocker, both in shutter and tilt door position, doesn’t guarantee any protection from water, noise, weathering and burglary
  • Entrance window-doors not properly locked don’t offer any protection from intruders
  • Periodically check the screws fixing and functionality. If necessary, regulate or change any worn out part
  • Only allow qualified personnel to regulate the hardware, especially the upper scissor and the tilt door  movements stands, as well as the eventual changing of worn out parts
  • Always keep the external darkening fixed to its stop. In case of strong wind (speed above 60 km/h) always close the darkening’s shutters. Excessive Aeolic burdens might lead to deformation or serious damaging of the hardware or to collateral damages. The stops installed for the darkening can guarantee the shutters capacity when left open in ordinary wind conditions (wind speed under 50 km/h). If you have installed stops that snap block the hinge, notice that they have bigger limitations and are only tested for reduced wind conditions (wind speed lower than 30 km/h)
  • Verify at least once a year the conditions of the paint following the indications of this manual
  • Verify at least once a year the correct hardware functioning. Always perform the lubrication of the moving parts at least once a year and in any case as shown in this manual
  • Periodically check the condition of the window boxes strap to avoid the sudden fall of the blinds.

02.3 CLOSING AND OPENING MANEUVERS

During the opening and closing maneuvers, follow the instructions reported below to avoid forcing the hardware (see pictures).

Handle’s position on windows and door-windows: the handle’s movement must be done keeping the window frame’s shutter close to the frame, so we suggest to always move the handle with one hand while pressing on the shutter with the other hand. Therefore, to obtain a perfect closing maneuver of a window or door-window shutter just draw the shutter near the frame and keep the two parts close with one hand, while rotating the handle downward; this will grant the precise operation of all the closing points expected in the window’s perimeter, while keeping a minimal effort on the handle.

To guarantee high technical performances that last through time, Caiframe uses high precision sealing systems. Therefore, unlike other products in the market, sealing and hardware act strongly in the Caiframe windows in the closing phase.

Fig. 1
Closing
Fig. 2
Shutter closing right window
Fig. 3
Shutter closing left window
Fig. 4
Tilt door opening
tab3_2 apertura sinistra

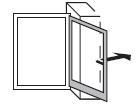
Shutter closing’s restoration in case of false tilt door maneuver : in case that, with the open shutter, you were able to rotate  the handle upwards (tilt door opening) it is necessary to:

Draw the shutter’s upper corner hinge side near to the frame and keep it close

Press the “false maneuver” mechanism ( an inclined lever positioned in the lower part of the closing hardware f the shutter)

At the same time,draw the handle in ‘on swing opening’ position (handle is horizontal)

Release the “false maneuver” mechanism

Draw the shutter in closing position and close rotating the handle downward.

Caiframe cannot be held responsible for any damage caused by improper use, product alteration caused by unauthorized interventions or by unauthorized parts.

Caiframe will also not respond of damages caused by inobservance of the instructions contained in this manual or by the improper use of the product.

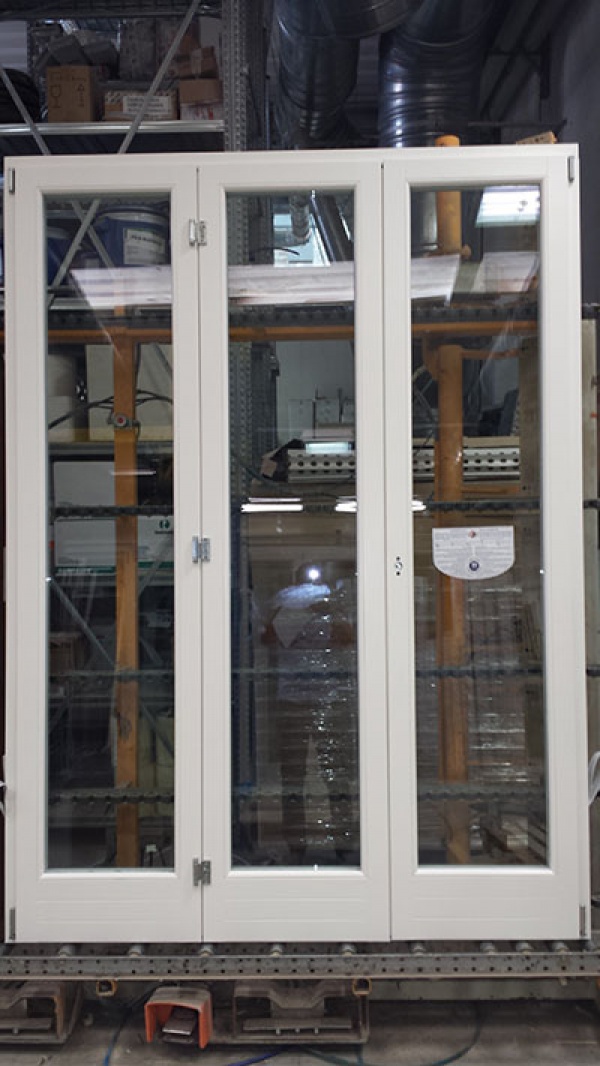
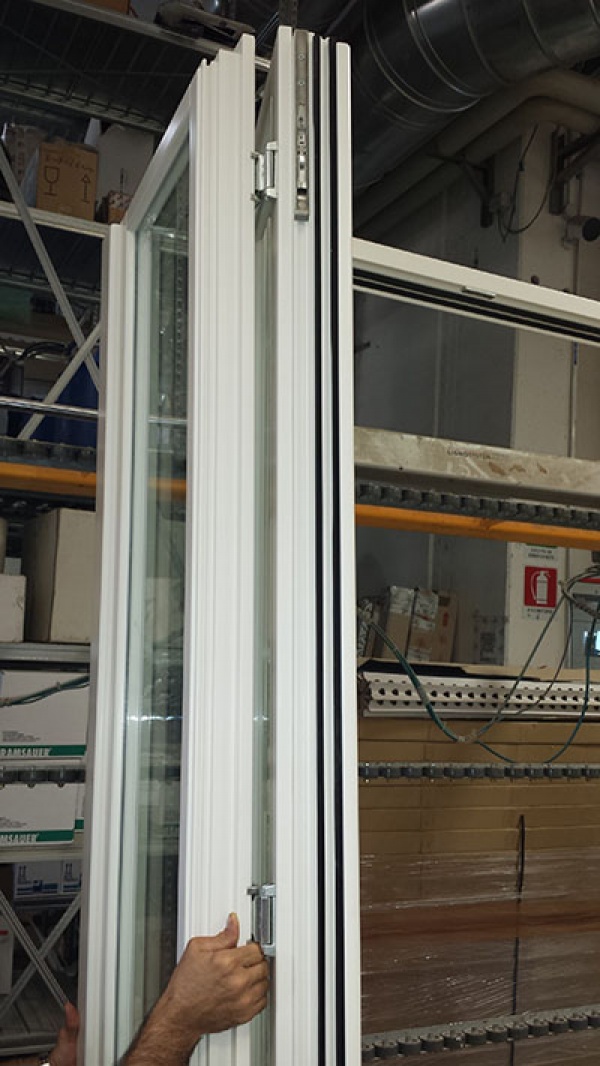
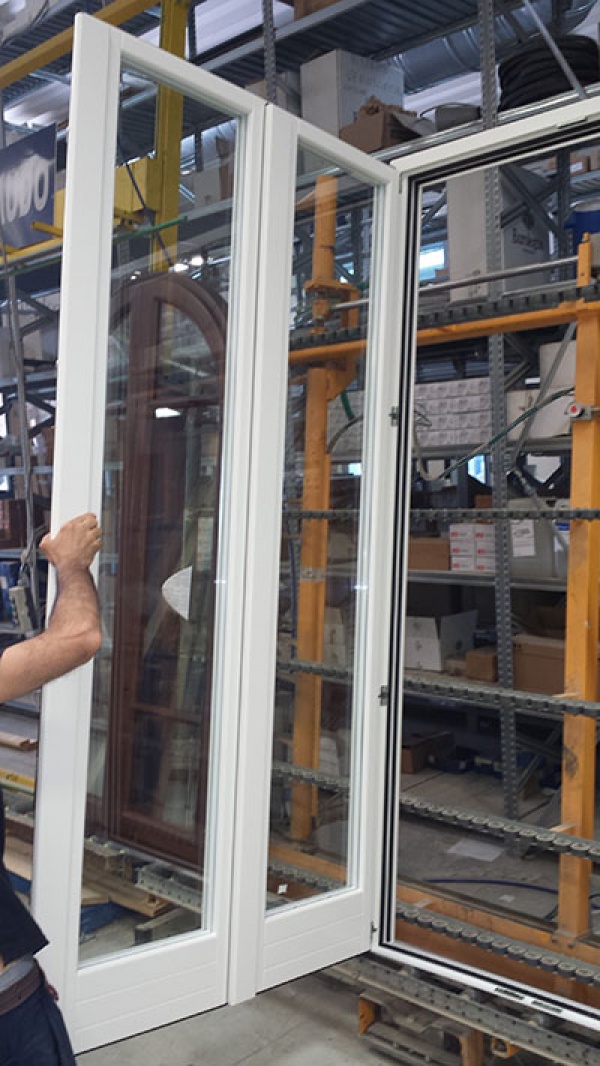
02.3.1 WINDOWS, DOOR WINDOWS, BLINDS, 3-4 SHUTTERS TAILGATES

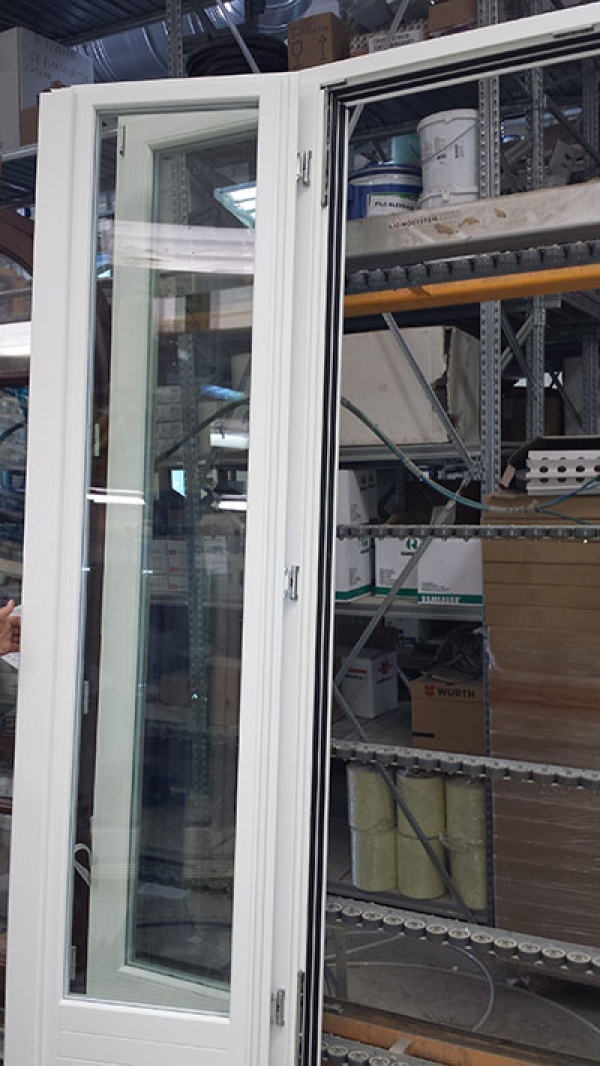
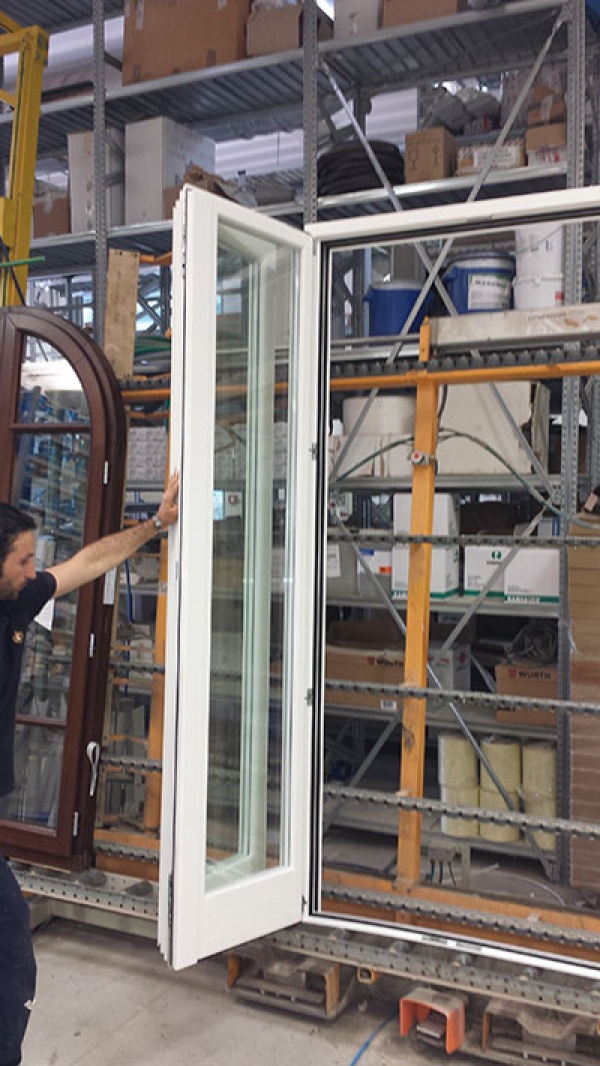
Open the semi-fixed side shutter only after completely rotating the main shutter and blocking the mono-command rod, if present.

ATTENTION!

Opening the 2 side shutters at the same time in “aligned overhang “causes a weight burden that cannot be borne by the hinges that will inevitably be damaged. 

See the picture below for the correct handling

tab4_1 finestre e portre finestre

Windows with three or four side shutters must be mandatory blocked in the building site, since their function is just to enhance the light. The blockage must be done by installer inserting a screw inside the upper rod. As a consequence, to unlock the rod and allow the opening of the third/fourth shutter, you have to first unscrew and remove the screw blocking the rod. This operation must be performed only in exceptional cases, and paying a lot of attention since their opening and closing is not guaranteed. In case of opening of the third and/or fourth shutter you will have to proceed with a ‘packaging’ opening and not with an “aligned overhang” opening of the shutters, that would cause the overload and consequent subsidence of the hinges. For a correct opening, follow the sequence reported below:

The window is in ‘closed’ position

Open the shutter positioning the handle horizontally and pair the second shutter with the third shutter

Exclusively only  after pairing the shutters proceed to unlock the third shutter and open it

The shuttes is now open correctly

Absolutely avoid opening the shutters as reported below

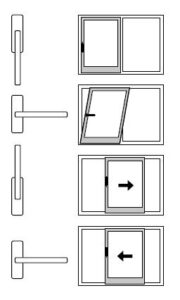
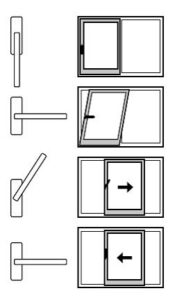
02.3.2 SLIDING PEAKING

tab5_1 alzanti scorrevoli Opening and sliding position

Drawing the handle downward, the closing pins/hooks release the shutter from the frame, allowing it to open. At this point, the shutter is free to slide on the rails to the end of stroke, secured by its side buffer.

ATTENTION!

Considering the risk of shearing and conveying, the opening shutter must never slide until aligning behind the vertical upright of the fixed shutter in the Sliding Peaking 1 mobile shutter, never until aligning behind the mobile shutter of the Sliding Peaking 2 mobile shutters, never until disappearing inside the compartment of the Sliding Peaking Internal Wall, never until hiding beyond the light of the Sliding Peaking External Wall. The end of stroke must therefore guarantee that the open shutter is blocked so that the mobile upright is always in light (see picture 1, 2 or 3), avoiding the risk of shearing, conveying, damaging and wounds danger due to crushing.

tab5_2 posizione di chiusura

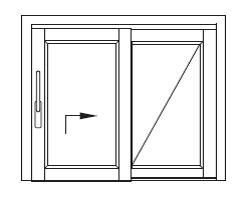
Closing position

Let the shutter slide until perfectly reaching the side frame. Turning the handle 360°vertically, the pins/hooks of the closing mechanism come into operation, guaranteeing the shutter’s closure on the frame.

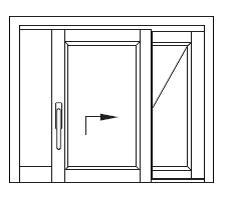
02.3.3 PARALLEL SLIDING

immagine-illustrativa-finestre-scorrevoli-paralleli Movement with the Automatic hooking system

Caiframe uses as a standard the advanced automatic hooking system, which facilitates the closing phase: letting the shutter slide towards the frame during the closure, this one automatically hooks itself and positions in tilt door. To completely close the shutter you act manually drawing the upper part of the shutter close to the frame, and turning the handle downward to activate the mechanisms of total closing.

immagine-illustrativa-finestre-sistema-confort Movement with Comfort System

The parallel sliding can be equipped with this system on demand, to make the shutter closing phase even easier.

Letting the shutter slide towards the frame, this one automatically hooks itself and positions in tilt door position. To completely close the shutter, activate the handle’s movement downward, you will notice that the special internal mechanisms will help you drawing the shutter close to the frame, to allow its full closure.

Anyway, we recommend, especially with large shutters, to help the action of the mechanism with your other hand when drawing it close to the frame.

USING THE ‘EASY CLEAN SYSTEM’

All the Caiframe sliding are equipped with the exclusive Easy Clean system that allows the opening of the second shutter to facilitate the external cleaning operation of the glass or the internal part of a roller blind, or to allow the passage of furniture or other bulky objects you need to bring inside the house.

This operation can be performed following the instructions listed below:

  • Position the mobile shutter perfectly in front of the opening, avoiding the lower part of said shutter enters the tilt door position
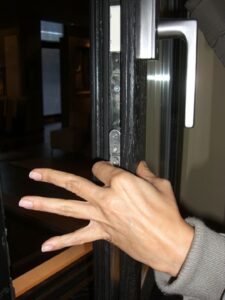
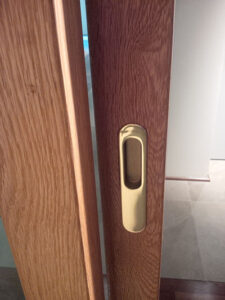
  • Temporarily unhook the cart so that the free shutter completely releases the inner side of the fixed shutter. In order to perform this delicate operation you will need a careful explanation and relative demonstration from the seller/dealer or by your local C.A.T.
  • Unlock the lower rod of the fixed shutter
  • Move the fixed shutter now released inside the room
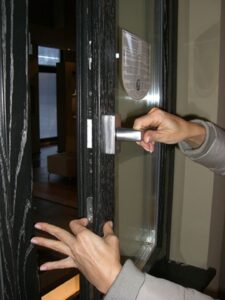
  • When the operation is over, be careful to close the fixed shutter locking the lower rod
  • When the fixed shutter is locked, be extremely careful to lock the cart again. You will also need a careful explanation and demonstration for this delicate operation, either from your seller/dealer or from your local C.A.T.

ATTENTION!

The Easy Clean system is very useful and solves many limits of the traditional Parallel Sliding, but because of its delicacy, we suggest to use it in the presence of qualified personnel, especially for the first times. Even in the future it must always be used by practical people with a good dexterity, otherwise always contact your seller/dealer or the nearest C.A.T.  The Easy Clean system, for the reasons mentioned above, is not a shutter closing/opening system that can be used every day, but only seldom and only for special needs.

0.2.3.4 BELLOW SLIDINGS

tab7_1-scorrevoli-a-libro 
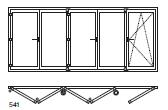
Moving and closing
The opening and closing, as well as the tilt door system, is equivalent to that of every window.
To allow the shutters sliding, position the handles horizontally, so that the closing mechanisms are turned off.
Once the shutters are open, it is possible to drag them in the side position.
tab7_2-scorrevoli-a-libro 
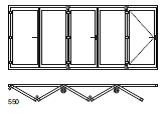
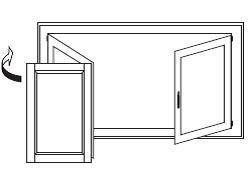
Tilt Door Mechanism
The functioning of the shutter in tilt door position is only possible for those shutters that are hinged sideways to the frame and therefore are in peculiar bellow sliding layouts, as the one reported above.
On the contrary, it is impossible to provide tilt door systems for shutters hinged to other shutters, such as, for example, in this layout.

02.3.5 HORIZONTAL BALANCE

tab8_3-bilico-orizzontale Closing position

Positioning the handle horizontally on the right, the complete closing mechanisms are activated and you have no ventilation.

tab8_2-bilico-orizzontale Intense ventilation position

Positioning the handle vertically, the closing mechanisms are unlocked and allow the shutter to rotate until it reaches a position that permits a great air change.

tab8_1-bilico-orizzontale Micro ventilation position

Positioning the handle horizontally on the left, the closing mechanisms are activated but allow the micro ventilation.

tab8_4-bilico-orizzontale

ATTENTION!

Avoid overloading the shutter, danger of wounds and damages to people and things.

02.3.6 VERTICAL BALANCE

tab9_1-bilico-verticale Closing position

Positioning the handle vertically, the total closing mechanisms are activated and we have no ventilation.

tab9_2-bilico-verticale Opening position

Positioning the handle horizontally, the closing mechanisms are unlocked and let the air flow until reaching a position that allows a great air change or allowing the passage of people and things.

02.4 INSTALLATION, USE AND MAINTENANCE WARNINGS FOR POWERED COMPONENTS

In this section, Caiframe provides information and /or suggestions regarding powered components applicable to the window. Anyway, during the installation, use and maintenance phase, please refer to the technical documentation by the builders of said electric and electronic components. Such documentation is provided together with the window in the accessories box, so during the delivery phase we recommend to read it carefully and keep it with care.

This manual, together with the manuals of the electric and electronic parts, must be read before the installation or the execution of every kind of intervention.

This documentation must be therefore kept by the customer and made available for further installation or maintenance interventions, other than for the purchase of spare parts.

The operations regarding electric and electronic components must be performed only by specialized personnel and therefore in case of necessity we invite you to contact the dealer/retailer or the nearest C.A.T.

02.4.1 INSTALLATION

ATTENTION!

The installation of electric and electronic components must only be performed by specialized personnel, strictly avoid DIY. Ask your dealer/retailer or the nearest C.A.T. before proceeding with the installation of the electric or electronic components, make sure that the electrical system to which they will be connected is complies with the regulations in force. The electric and electronic components provided by Caiframe are only compatible with electrical systems complying with the regulations in force.

ELECTRICAL CONECTION: the connection to the electrical system must be done in respect of the technical documentation of the electric/electronic component’s producer. Such documentation is provided by Caiframe together with the component and can be found inside the accessories box.

GENERAL WARNINGS

Any malfunctioning must be quickly reported to the nearest C.A.T.,to allow the intervention of professional operators.
Before any intervention on the electric/electronic component, the main switch must be shut down, so that electricity won’t reach said component.
Avoid direct contact of the electric/electronic components with moist and detergents. The sealing gaskets must not be attacked by paints or acid detergents. Avoid painting the mechanisms.

02.4.2 ELECTRIC LOCKS

Can be installed on entrance doors and can be activated by an electric pulse commanded through a push button panel. The push button panel can be positioned in any place, as requested by the customer. It obviously needs an electric link between the exiting wires from the window and the push button panel itself. Such link, as well as the push button panel’s installation, must be done by a specialized electrician following the regulations in force.

PUSH BUTTON COMMAND
Simply pressing the push button, an electric pulse is sent to activate the mechanical feedback, opening the electric lock.

ATTENTION!

Before performing any installation, use and maintenance operation, carefully read the user manual by the electric/electronic component’s dealer, provided by Caiframe together with the window and included in the accessories box. Whether the manual cannot be found in the accessories box, contact your dealer/seller or the CaiframeC.A.T. to request all the technical documentation.

02.4.3 POWERED WASISTAS

The opening and closing of the window is automatic, thanks to an electric motor. The command is controlled by a push button, and the push button panel can be positioned according to the customer’s request. The panel obviously requires an electric link with the motor. Such link, as well as the push button panel’s installation, must be done by a specialized electrician, following the regulations in force.

OPENING
Operating the push button on the opening position, the shutter opens. To regulate the opening width, keep pushing the button until reaching the desired position.

CLOSING
Operating the push button on the closing position, the shutter will close until its limit

LIMIT’S REGULATION
Refer to the user manual of the electric/electronic component’s producer. The manual is provided by Caiframe together with the window and is located inside the accessories box.

ATTENTION!

Before doing any type of installation, use and maintenance operation, carefully read the user manual of the electric/electronic component’ dealer, provided by Caiframe togheter with the window and included in the accessories box. If you don’t find the manual in the accessories box, please contact the dealer/retailer or the Caiframe C.A.T. to request the technical documentation.

Periodic checks How Problems Causes Solutions
Yearly check of the electric cables integrity

Verify limit every six months

Inspect the electric cable exiting from the motor to verify its integrity

Activate the closing and opening system until full limit and verify that the limit intervenes at the right moment avoiding the motor overloading

The closing and opening mechanisms overly strain

Eccessive air and water permeability

Setting not appropriate for the hardware

Window’s settling

Foreign bodies presence

Contact C.A.T.

Contact C.A.T.

Carefully inspect and remove any obstacle

02.4.4 BLINDS- MOSQUITO NET – CURTAINS – POWER SCREENLINE

The automation allows the possibility of being commanded with a push button or a radio control.

PUSH BUTTON COMMAND

The push button panel can be positioned in every place required by the customer. Obviously, it needs an electric link between the cables exiting from the window frame and the push button panel itself. Such link, as well as the push button panel installation, must be done by a specialized electrician following the regulations in force. The push button must have three positions:
Upper, lifted to the limit
Central, keeps in place
Lower, lowers to the limit

COMMAND WITH RADIO CONTROL
Powered Blinds – Mosquito net – curtains: the motor activating the handling can be predisposed, by request, to receive long distance commands from a radio control, for a more comfortable use. Such request must be done during the ordering phase, since the mtor must be equipped with some components that differ from the standard.
Screenline: handling with a radio control requires a special control unit.

LIMIT REGULATION
Refer to the electric/electronic component producer’s user manual. The manual is provided by Caiframe together with the window and is located inside the accessories box.

POWERED BLINDS PARALLEL CONNECTION
If connecting powered blinds in parallel and/or with domotic systems, it is mandatory to equip the motors with specific control units and to follow the instructions contained in the Blinds Motors Control Unit sheet.

ATTENTION!

Before performing any installation, use or maintenance operation, carefully read the users manual by the electric/electronic component’s provider released by Caiframe together with the window and located in the accessories box. Whether such manual cannot be found in the accessories box, contact your dealer/retailer or the Caiframe C.A.T. to ask for all the technic documentation.

PERIODIC CONTROLS HOW PROBLEMS CAUSES SOLUTIONS

Yearly check electric cables integrity.

Verify the limit every six month.

Carefully follow the indications contained in section 10 ‘Blinds’.

Inspect the electric cable exiting rom the motor and verify it is completely undamaged.

Activate the closing and openig system until reaching the whole closing/opening position, to verify the limit intervenes at the right moment to avoid excessively overload the motor.

The system doesn’t  go up/down or gets stuck in a position. No power to the motor

A foreign body is present on the sliding guides

Motor breaking

Verify if there is electricity in the house. Subsequently checkthe switch’s positioning.


Inspect all the guides and eliminate any foreign body


After performng all the previous checks without a positive result, contact the nearest  C.A.T.

02.4.5 POWERED EXTERNAL DARKENINGS (SHUTTERS – TAILGATES – WINDOW DOORS

The motorizations applied to darkenings allow an automatic opening/closing. The automation contemplates thechance to be commanded with a push button or radio control.

PUSH BUTTON COMMAND
The push button control panel can be positioned in every place requested by the costumer. It obviously requires an electric connection between the cables exiting the motor and the panel itself. Such connection, as well as the push button panel’s installation, must be performed by a specialized electrician following the egulations in force.

RADIO CONTROL COMMAND
The motor activating the handling can be arranged upon request to receive remote commands from a radio control for a more comfortable use. Such request must be made during the order phase, since the motor must be equipped with some components that differ from the standard.

LIMIT ADJUSTMENT
Refer to the electric/electronic component’s producer user manual. The manual is provided by Caiframe together with the window and is located inside the accessories box.

ATTENTION!

Before performing any installation, use and maintenance operation, carefully read the user manual by the electric/electronic component’s provider released by Caiframe together with the window and located inside the accessories box. If the manual cannot be found, contact your dealer/seller or the nearest Caiframe C.A.T. to ask for the technical documentation.

PERIODIC CONTROL HOW PROBLEMS CAUSES SOLUTIONS
Yearly check electric cables integrity.

Limit’s check every six months.

Inspect the electric cable exiting from the motor and check its integrity.

Activate the opening/closing system until the closing /opening position is complete, checking that the limit intervenes at the right moment, avoiding excessively overloading the motor.

The closing and opening mechanisms excessively strain.

The motor is stuck in a position or does not activate

.

No power to the motor.

Presence of a foreign body that prevents opening/closing.

Motor breaking.

.

Verify if there is electric power inside the house. Subsequently check the switch’s positioning and remove any foreign body that block the functioning.

After performing all the previous checking with no result, contact the nearest C.A.T. 

02.4.6 POWERED PEAKING SLIDING

The automation of the siding provides the possibility of being activated with a push button or a radio control.

PUSH BUTTON COMMAND
The push button panel can be positioned in every place requested by the customer. It obviously requires an electric connection between the sliding and the panel itself. Such connection, as well as the panel’s installation, must be performed by a specialized electrician, following the regulations in force. Activating the push button, the automatic mechanism first provides for lifting the shutter and then, always automatically, it starts the opening until reaching the desired positioning. To put the shutter in a desired position, reversing the opening and moving to the closing position, you just activate the closing push button. When arriving to the closing position, at the limit, you have to activate the closing push button again to automatically lower the shutter. Such operation are managed by an electronic sheet that can be programmed following the indications contained in the user manual provided by the sheet’s provider, released by Caiframe together with the window and located in the accessories box.
LIMIT’S ADJUSTMENT
It happens automatically, once the system performs its first running.

ATTENTION!

Before performing any installation, use or maintenance operation, carefully read the user manual by the provider of the electric/electronic component provided by Caiframe together with the window and located inside the accessories box. If the manual cannot be found in the accessories box, please contact your dealer/seller or the Caiframe C.A.T. to ask for all the technical documentation.

PERIODIC CHECKS HOW PROBLEMS CAUSES SOLUTIONS
EVERY  3 MONTHS

Verify any possible friction in the sliding of the shutter and shutter guide profiles.

Verify the correct insertionof the studs inside the ‘cremonese’

Verify the absence of friction near the ‘mantovane’ and brushes

EVERY SIX MONTHS

Control the seals positioning and integrity

Control tensioner springs mvement

EVERY TWO YEARS

Degrease the motro’s chain and grease it up again.

Follow the directions of the specialized personnel from your dealer/retailer or C.A.T. The shutter doesn’t slide or gets stuck. No electricity.

Possible foreign bodies presence.

Damage of the electric circuit/sheet.

Chain damage.

Motor damage.

Verify if there is electricity inside the house. Verify the push button’s positioning.

Carefully verify if there is any foreign body along the upper and lower sliding guides and possibly remove them.

After performing all the previous operations without result, contact your dealer/seller or the nearest C.A.T. più vicino.

For a manual handling of the sliding’s shutter, insert the handle provided inside the special hole in order to activate the lifting of the shtter and then slide it at will.

Why choose CAIFRAME?